 |
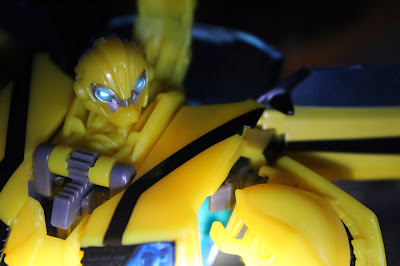
| TF: Prime Deluxe Bumblebee |
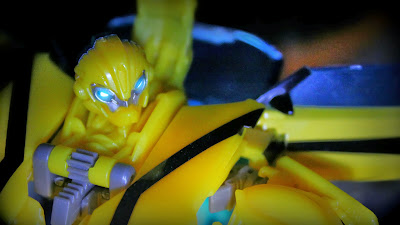
Since starting this blog I've been evolving the way I use my collection - from initially wanting to document each figure as I purchased it (on my way to building a Jabba's Palace display), to then wanting to focus on diorama building; however I've since found that the one constant has been actually photographing the toys, and creating images that attempt to show these characters at their best. The shot of Bumblebee above is my most recent, and I'd like to share some of the techniques I used to create it...
Firstly, the kit - I shoot on a Canon 600D DSLR, usually using the
18-55mm 'kit' lens, but sometimes a 50mm (although this generally only
works for larger objects). This is my equipment for my day job as a
filmmaker though, and something that I've worked up to. My initial
forays into toy photography were on a Canon Powershot, and photographers
such as
R2witco take a lot of their stuff on camera phones. Basically,
as long as you've got a macro function (often displayed as a flower on
the camera settings) and can find a way to set the focus where you need
it, then your camera is suitable for the job.
 |
| One of Many |
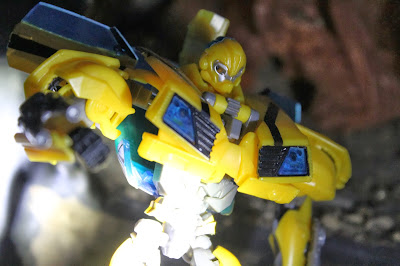
This shot was an unused take from the session which yielded the final image. Here it shows more clearly the background, which is the old fireplace in my study. Whilst barely recognisable as anything, the important thing for an action figure shot is that it doesn't look like a house. Nothing kills the 'reality' of a Dinobot shot more than Grimlock being out scaled by a potted plant. What the above shot also shows is the lighting setup I was employing - basically, one torch. There was a little bit of light from the window (it was dusk), but that torch was my primary light source. I wouldn't encourage shining the light directly onto your subject like that, but I knew I would be cropping the image anyway (more on that later).
I'm often lazy with lighting, either taking the figures outside or shooting around the office window (nothing beats indirect sunlight as a light source), but taking the time to create a proper lighting setup often works wonders - see my PAK Batman shots
here. I think it's to do with cast shadows, which helps to integrate the figure into the environment and in turn create a sense of reality. It's something I'm going to work on, especially as winter descends and daylight becomes scarce.
 |
| And Another... |
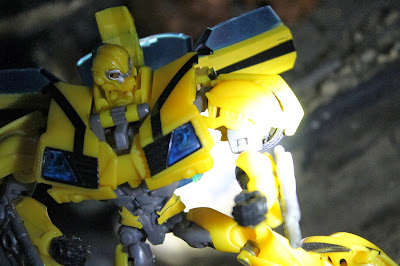
What I consider the most important point of action figure photography is to GET LOADS OF SHOTS. Whenever you have a setup, go trigger happy - I'm gonna presume that you're shooting on digital so the cost of film isn't an issue. I find that it takes me a little while to get 'warmed up' to a subject, and really get an idea of what works. Mess around with your angles, the pose of your figure(s) and experiment with what you want to focus on - and even after you think you've got the shot that you're after, get a couple more. You may surprise yourself. The other thing to remember is that cropping is your friend - you might be gutted that the stand for your figure is just visible in the frame, but with a crop and a re-composition it could still be the perfect photo.
 |
| The 'One'. |
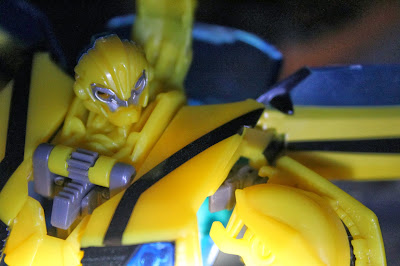
When I had the shot of 'Bee that I was after, the fun part started. Firstly I opened the image in Photoshop (Paint.net is a superb free alternative if you don't have access to this), and then I did a quick Google search and found
this rather superb guide to creating eye FX on the TFW2005 forums. Thank you, Process - if that is your real name...
After the eyes were completed I imported the image into
Picmonkey, my editing suite of choice. Here I cropped the image to a 1920x1080 resolution (my usual canvas size), and then played around with the exposure, saturation and sharpness settings to get a base image I was happy with. Using these tools really does require trial and error, as well as a degree of personal preference, but it's at this stage that the image really starts to come alive. I should also note that you can use the colour settings on Picmonkey to fix the white balance, which is always useful - simply use the neutral picker and select the part of the image that should be as close to pure white or black as possible, and it will shift the colour tones accordingly. Again this takes practise, but when you get the hang of it it's a valuable tool.
 |
| The Glow! |
When I was happy with the core picture I used some of Picmonkey's various filters to complete the image, as seen at the top of this post. Once more this comes down to experimentation and personal preference as to how you want your image to look, but there are some pretty cool filter options on there. Really editing is all about how you want the image to look, and finding ways of making it happen. I've been doing this for a few years now and I still haven't found one particular style that I've made my own (look at
Ed Speir IV's work for examples of instantly recognisable photos), but I'm definitely developing my skills, and I think that a style will come with that eventually.
There it is then, a few of the tips that I've picked up when it comes to action figure photography. I hope you find them useful... Now go and take some shots!


