Thursday 16 August 2012

TF: Prime Deluxe Bumblebee Review

Bumblebee
When I got a £10 off voucher for TRU, I took a few repeated visits to figure out what to use it on. The Star Wars line is unfortunately peg-warming under the unwanted and ill-thought out Movie Heroes branding, along with a few TVC figures I don't want (however tempted I was by Lucky Farlander), and the Turtles line isn't being stocked yet. Despite my recent posts, I don't really have enough of an affinity with Ben 10 to have warranted using the voucher on that line, and so what else was there?

Well, Transformers: Prime, for one.

I've seen the first series, and I'm a big fan of this iteration. It somehow manages to blend the cartooniness and human characters of TF: Animated with the mythology and brutality of G1, and even somehow makes room to include the less offensive of the Bayformer's visual stylings (Bumblebee being a fine example of the latter). I hadn't paid much attention to the toyline before though, and so with a voucher use-by date approaching, I took the plunge on the Autobot Camero.

The Packaging 

Pretty straightforward blister card for this guy, with Bumblebee displayed in Camero mode. As it was a straight-up choice between Bumblebee and Cliffjumper, I had to go with which vehicle I preferred the look of, and this guy won out!


The box art is nice, obviously show-styled, with the Autobot symbol in the background. The back of the box has pictures of Bumblebee in both modes, with the smallest of character profiles reading: "Bumblebee is a brave Autobot warrior and scout" in several languages, and a picture of the Autobots from the show along the bottom. Nowhere near as exciting as getting the tech-spec with the red see-through reader, but a darn sight better than just plastering a multi-lingual sticker over the back (looking at you, European Vintage Collection!). The toy is tied into the bubble with cardboard string ties, and the guns are held in place by a clear plastic cover. All pretty simple to deal with, and your Bumblebee is away!

Go Go Camero!
The Good

So, yeah. Bumblebee is a pretty exciting toy right out the package. The alt-mode is tight, with very little to indicate it's not a normal toy car - perhaps the robot kibble visible through the windshield and the hole in the engine block are about the only clues to give the Autobot game away. The paint job is great, and befitting of a character called Bumblebee, and the translucent blue used for the windows and headlights works really well to give the car an understated but still cartoony feel. Also, the detailing inside the headlights looks great, and shows the attention to detail on the sculpt (as also evidenced by the door handles, and the little rivets around the body work.

The transformation took me one go following the instructions, and then after that I was away. If you were to look at the different modes you'd be forgiven for thinking that it's a fiddly and potentially toy-breaking exercise, but it feels instinctive, rigid, and just well designed. The limbs and doors all snap into place with no fuss, and on either end of the process you're left with either a tight alt-mode Camero, or a tight Autobot warrior scout robot!
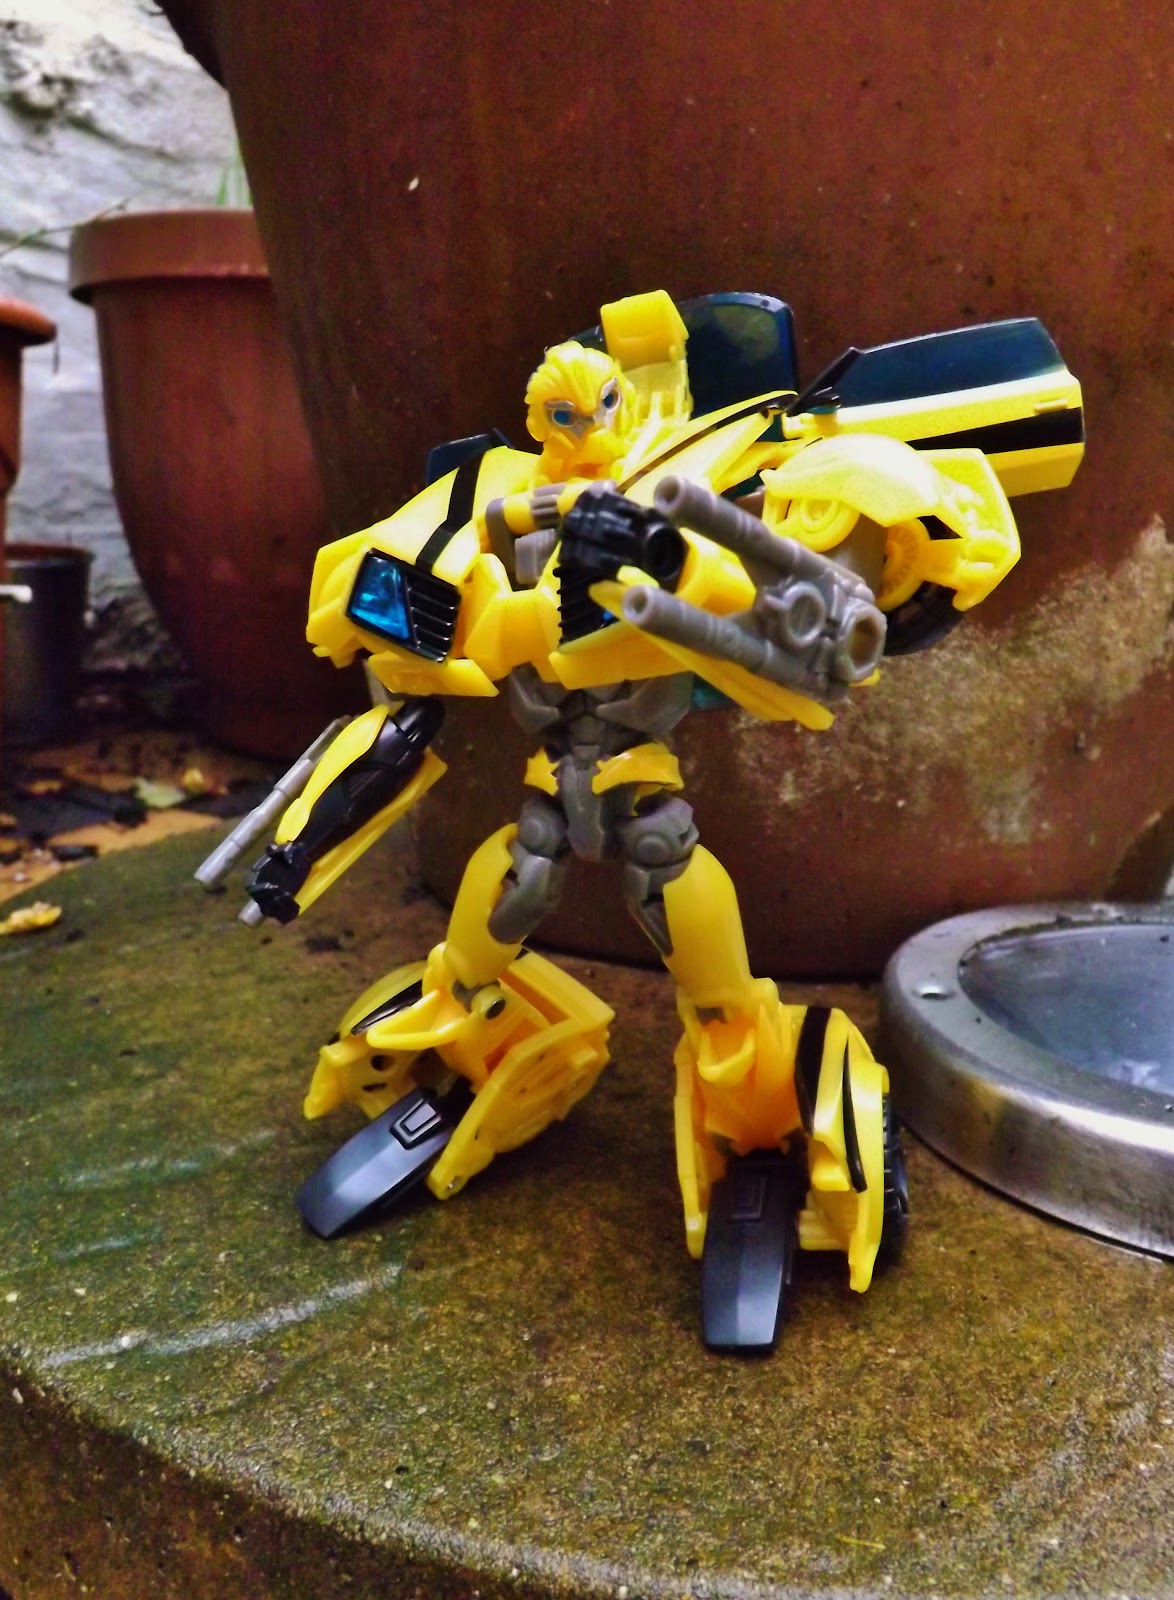
Scoutin' About...
I was particularly impressed with the robot mode. Following the simple transformation he stands tall, with points of articulation at the neck, shoulders, elbows, two points at the thighs, and then the knees and feet. The lower legs are wide enough to accomodate a lot of different stances, and whilst I have to acknowledge I've been out of the Transformers game for a while (save the odd Dinobot or Galvatron), I am really pleasantly surprised by how articulated this figure is, particularly for the price point. I also want to make a point about the light-piping. As anyone with TF: Universe Cyclonus would know (and there is a review planned for him too!), Hasbro has been really excelling at getting the light-piping for their Transformers spot-on, and Bumblebee is no exception. Get his head backlit, and the round, blue eyes really lend life to this figure.

The Bad

It's not all good though. As much as I'm enjoying this toy, there are a few areas where it could've been improved. To start with, I'm not fond of the guns; at the very least not in alt-mode. I get that it's a toy, which is why it's by no means a deal-breaker, but the engine block would look better complete than with the gun shaped hole in it. But then, in robot mode, attached to the wrists, Bumblebee's guns look great, so, there you go. How much of a negative point this is depends more upon your display preferences, I would suppose.

Car Good Plane Bad.
A less debatable negative is the paint apps. Whilst the design is solid, it's literally made of yellow, grey and blue plastic, with a dash of black paint. Again, that's befitting of a toy, but when you see some of the sculpted details up close, you realise how much there is to this toy that isn't highlighted. My final gripe is about one point of articulation that was missed - the wrists. The hands are sculpted open for holding the guns, but then the wrists are also locked in place. Maybe it was so Bumblebee couldn't be pictured making offensive gestures, I don't know; but either way, that knocks a mark off the posability. You could make an argument for a swivel waist as well, but I don't think that would be as necessary, especially when you consider how that could structurally weaken the toy.

Overall

So, the negatives are pretty much minor aesthetic points, whilst the positives are a sturdy, articulated, simple, and fun toy. If you own only one TF: Prime figure, well, then you're probably me. If you don't own any and need somewhere to start, you can't go wrong with the Deluxe Bumblebee.
                
****1/2

Friday 10 August 2012

Building the Box: Two


Welcome to Part Two of my how-to guide to building the Dagobah Box! Part One is here if you want to get caught up, otherwise, let’s get going!


Before properly fixing the tree into place, I needed to decide upon a background. I’d originally wanted to paint my own background, and did a quick mock up with pastels, but wasn’t really happy with the effect. I also tried a print out of a dark, Dagobah swamp-esque image, but the colours and scale didn’t really match. After trial and error with these images, I eventually settled on the image from the film (and the OTC box-art), showing Luke’s partially sunken X-Wing in the distance. 

Pen & Pastel Backdrop
Generic Swamp Backdrop
I dry-brushed the floor of the box with dark green acrylic paint to to help achieve the swamp effect, and then added more branches to the tree, twisting some regular garden twine around the branches to form vines, and covered it in moulding plaster to add texture and hold it all together. When this was complete I spray painted it brown again, dry brushed it dark green, and fixed it properly into place.

It's come a long way from being a toilet roll tube...
Whilst the spray paint is absolutely the best tool to work with for diorama building (I’m converted!), the gloss left quite a singular, damp look to the floor. To add texture I bought some modelling flock (autumn leaves, if I remember correctly), and used PVA glue to apply it to certain areas of the floor and tree.

Pre-flock...
Almost finished. I cut some holes in the top of the box and poked through some vines from my garden on the opposite side of the tree, and used more modelling clay to add texture. I once again used a base layer of dark brown acrylic paint, dry brushed with dark green, and it was done!

...And finished!
And so, I’ve had it for some time – what do I think of the Box as a set for photography, or as a display piece now? What would I do differently? Well, thank you for asking… :D


As a set, the box has worked well for pictures, but also pretty much served its purpose. As it’s such a small scene, and I can only really photograph in one direction, there isn’t too much more I can do with it. The sides and roof of the box are essential in creating the mood of Dagobah, but unfortunately they limit the lighting options – all I can really do is flood the front with light, whilst trying to avoid too much reflection from the background image.


As a display piece, the box is a bit of a mess. Whilst the scene is suitable, the cardboard box warped as soon as I applied the papier mache, and the shape has become further distorted through applications of paint and wet plaster. I’ve had it sat out on my display shelf before, and as happy as I am with the scene, the presentation looks amateurish. I will absolutely use wood or polystyrene for future displays.

Aside from the materials, I was disappointed with myself for not putting the effort in to paint a custom backdrop. The location of the X-Wing in the background messes up the screen accuracy of the scene, and if you follow the lake from the background it should actually flow right into the box itself! Those two points aside though, I don't think it works that badly.


The most important thing I’ve learned from building the Dagobah Box is that a scene or diorama needs to have a specific purpose from the beginning – be it for screen accuracy, display, play or whatever. I made a lot of choices on the fly whilst making this, and the overall look has suffered. I’ve since made a generic display piece, and having made it for a definite purpose, the final effect is much better. If, and when, I embark on a Dagobah scene again, I fully intend to make it scene specific, use appropriate materials, and hopefully end up with a more satisfactory end result.

Tuesday 7 August 2012

TFA Snarl!

I finally watched the Transformers Animated episode 'Blast from the Past' today, which introduces the Dinobots to that series. Yeah. Let's just say I prefer Wheeljack finding fossils and going from there...

Robot! Dinosaur! Poor Design? Yes!
Snarl was Slag, but his name got changed due to the connotations of the word over here in the UK (a slag being an abusive term implying a person's promiscuity). I'm sure he was originally named after waste metal though, which would've been appropriate, because this Transformer is pretty rubbish. Still, gotta keep the family together!

Sunday 5 August 2012

Building the Box: One


The Dagobah Box is the most ambitious set-piece I’ve made so far; and whilst I’ve thought of many ways to make it better (or to improve version two…) since finishing it, it still works great as a display piece for my Dagobah-themed figures. Here, long overdue for both the Box and this blog, I present a making-off guide, with plenty of WIP shots!

Calvin & Hobbes: Essential reading for everyone.
First of all I found an ordinary shoebox, as inspired by Calvin’s diorama school project. The first challenge for me was to decide which part of Dagobah I wanted to show. The box wasn’t big enough for my POTF2 X-Wing, so I ruled out doing the crash site. I considered making Yoda’s hut, but the box dimensions would have made it really squashed, so that was scratched also. I knew I would primarily be using the set to display the OTC Dagobah wave figures, and so, following a lot of research (by which I mean the hardship of watching Empire Strikes Back :D), I decided on the clearing where Luke has the vision of Cloud City.


I made the tree by selecting several suitable branches from my garden, and chopping them down to the right size. I used a toilet tissue roll as the main trunk of the tree, and then positioned the branches as the roots, holding them in place with masking tape.


Using off-cuts of card and branches to add texture to the ground, I then covered the floor of the box and the tree with papier mache, to unify all the different elements and create a base texture. After letting the glue dry, I checked the scale against the box’s soon-to-be residents…


I used a glossy brown spray paint to completely coat the inside of the box and the tree. Using spray paint was far superior to anything I would’ve done with acrylics and a brush, as the coating was so much more complete and even, as well as quicker to do. I felt at this point however that the box was too sparse, and needed more texture. To achieve this I took several smaller branches from my garden and put them around the floor, as logs and other swamp detritus. I also toyed with the idea of putting a second tree in on the other side of the box, but decided that I might still need the space.


I covered the floor and the tree in moulding plaster, marking it with my fingers as it dried, and used it to good effect on the tree to pull all the different elements together. I also added more twigs and branches to the tree at this point, to create a denser look. With one more coat of spray paint, the scene was beginning to take shape…


Click through here for Part Two, where I complete the set and look at what went right, went wrong, and how I’d do it differently next time!

You may like...

Related Posts Plugin for WordPress, Blogger...